As some folks may notice, during my website migration to jonathanlee.org, I not only labeled all my photos, but also added a small, unobtrusive watermark to the lower right hand corner of all my photos (highlighted in red).

While designing the watermark, I tried to look online, but didn’t find any useful guides for creating a watermark, so I decided to make my own. So, this will be a guide on how to FREE tools to design, create, and apply a watermark that is:
– Simple to design
– Discreet and unobtrusive
– Easy to apply and use
While I was trying to make a watermark and learning about watermark best practices, the internet was very little help. There are a lot of articles on watermarking, but they’re almost all fluff, boiling down to:
– Watermarking can help discourage plagiarism, but nothing can completely prevent it.
– Don’t ruin the image with a huge watermark that annoys viewers and distracts from the image, like so, courtesy of resource space:

On the other hand, there are fantastic watermarks, like this one from Farbspiel Photography , which have an almost hand-made quality to them. However, they are quite difficult to design, especially for somebody with little artistic talent, and take a long time to apply to multiple photos.

However, most people want something in between – something noticeable but discreet, something easy to design. For an amateur photographer posting his photos online, a travel blogger who wants to spend time exploring instead of on her computer, this middle ground watermark is very useful.
And while there are plenty of watermarking tools available, some of them free, none of the free ones were up to the task. They would either add their own company watermark on top of yours, force you to resize your images to be tiny, or are just plain ugly! So why pay money for bad software, when a perfectly good free solution is available?
Step 1: create watermark logo
I use a program named Paint.net, a free program that is powerful, easy to use, and best of all, free! You can download it here.
Using this program, I created these two watermarks:

![]()
So how did I create these in paint.net? Layers! See my paint.net screenshot:

And for more detail, see this illustration:
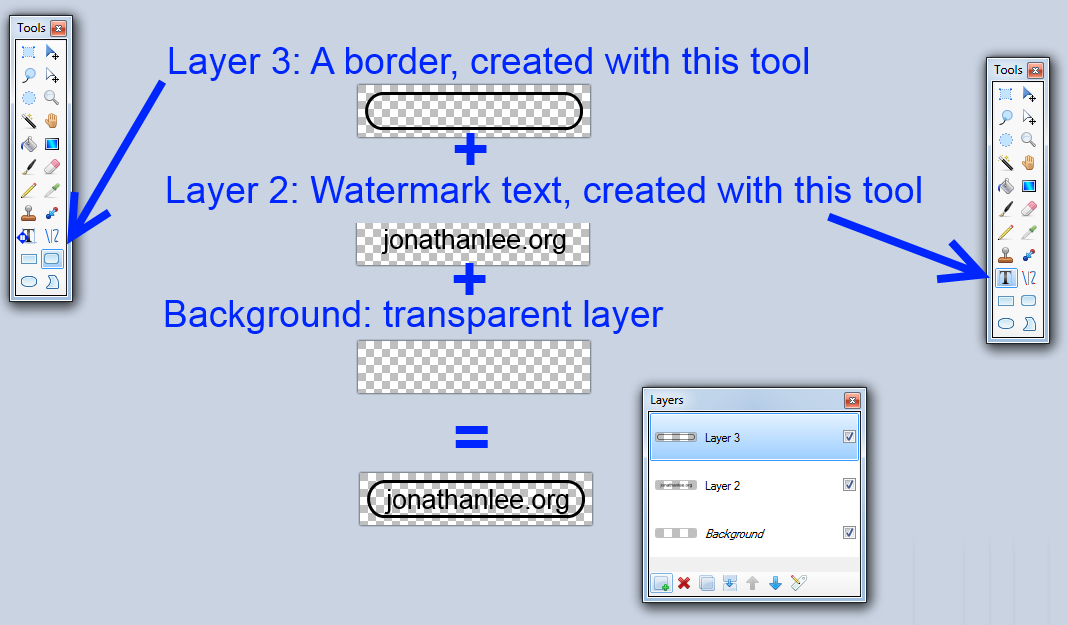
The important points are to have a transparent background (checkerboard colored in Paint.net), and to have a fairly solid color. This ensures that the watermark will show up discreetly on your watermarked image, without covering up too much detail.
Step 2: applying the watermark
To apply the watermark, you’ve got a wide variety of paid and free crappy watermarking programs to choose from. But why bother, when you’ve got an excellent free program, by the name of IrfanView? You can download the program here.
First, open upon the program, and choose “Bath Conversion / Rename” in the File menu.
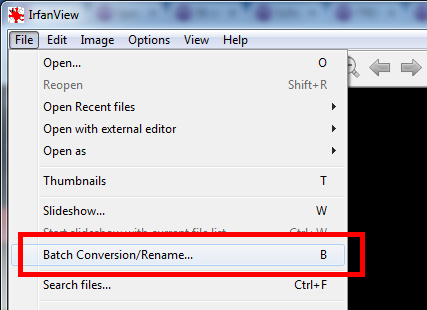
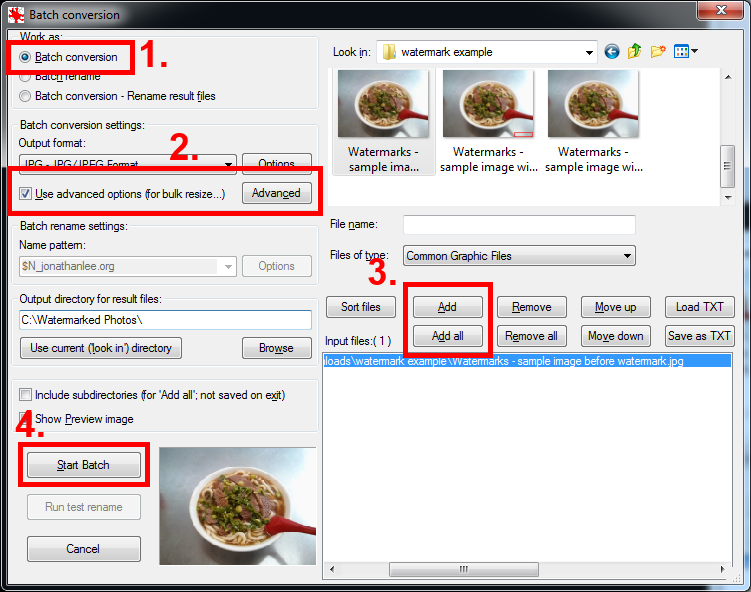
Next,
1) Set the program to batch conversion.
2) Turn on advanced options (see below).
3) Use the top right to navigate and find the images that you want to watermark, and add them to the bottom right list.
4) Start batch conversion! But don’t for get to set advanced options first (see below).
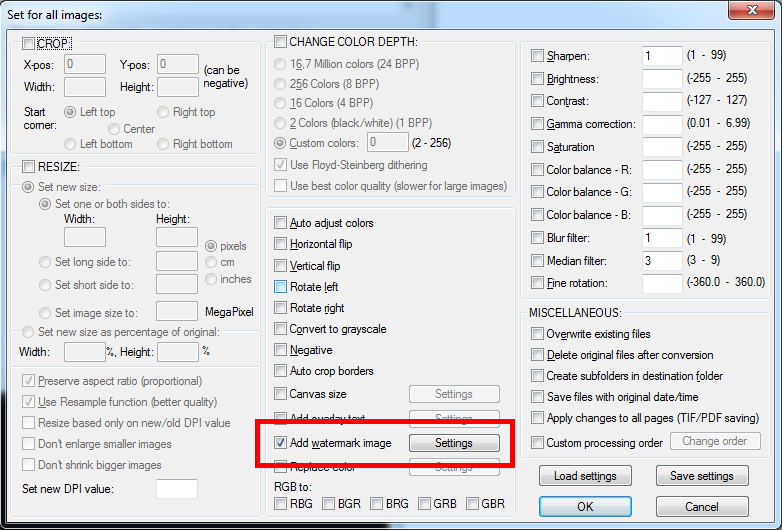
In the advanced menu, you want to turn on watermarking, then click the Settings:
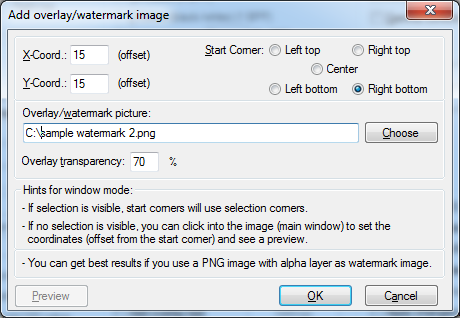
Finally, in the settings popup, you want to:
1) Select the watermark you created in step 1
2) Select where you want the watermark to show up – I suggest the right bottom corner of the image, and set a small offset (such as 15) so that the watermark is not immediately by the edge of the image.
3) Set transparency to around 70%, which makes sure that your watermark is visible, but doesn’t completely hide detail underneath.
Once all this is done, apply the watermarks, and you’ll soon have an elegantly but discretely watermarked image, ready for deployment! Before and after:


Interestingly, as some of you may have noticed, on this page on creating watermarks I have chosen not to watermark my instruction photos! Not everything needs to be watermarked!
Article Title: How to Create an Easy and Effective Watermark
You really did not show HOW to create a watermark. Two images of something in Paint.Net doesn’t do it.
Would be useful if you showed and explained the Paint.NET process in a step-by-step method. I have never used Paint.Net nor know how to use layers.